We R Memory Keepers Sew Easy Floss
Review | Sew Easy by We R Memory Keepers
I'm no stranger to stitching on my layouts, since I use my sewing machine to add detail to nearly every page I make, but I've always been a bit hesitant to try hand stitching- especially some of those gorgeous decorative stitches! I'm always nervous that I'll punch a hole in the wrong place on my page or create a part of the design out of scale with the rest of the pattern, so it's something that I've avoided in the past.I'm not avoiding it any more though! Since taking the Sew Easy system by We R Memory Keepers for a test drive, I've got a tool that takes all the guesswork out of creating both basic and decorative hand-stitched accents on my scrapbook pages. Today I'm going to introduce you to this system, and show you exactly how it works.

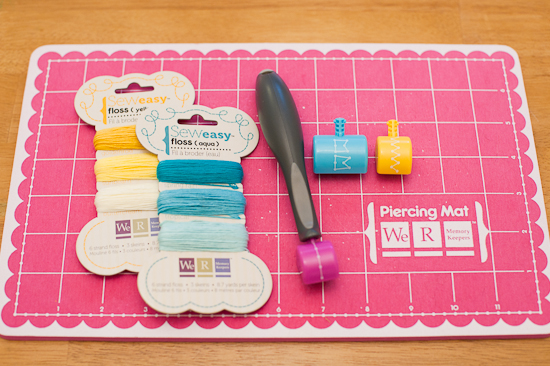
There are several components to the We R Memory Keepers Sew Easy system, but don't let that fool you into thinking that this is a complicated or expensive tool. The price point is actually very reasonable: the Stitch Piercer starter kit is $9.99 US (all prices listed are MSRP), and the decorative stitch heads are $2.99 each for small designs, and $3.99 for larger ones.You can use nearly any brand of embroidery floss in the Sew Easy system, which makes it a perfect way for those of us who have a stash of cross-stitch thread still hanging around to get it used up - not that I would know anything about that! We R Memory Keepers also sells several varieties of floss, including that currently oh-so-fashionable baker's twine. Sew Easy floss cards retail from $1.99 to $4.99 each, depending on whether they are standard, single-color varieties (such as the Yellow and Aqua cards pictured above) or more decorative designs such as their glitter-infused, variegated, or baker's twine Fancy Floss (pictured below).

Interchanging the stitch heads on the piercing tool is easy. Simply twist the head a quarter turn to the right…

...and pull to remove. Reversing the process makes installing a new head a snap.

To pierce the stitching holes on your project, all you have to do is press firmly on the Sew Easy tool while rolling it across your paper. Take care to keep the piercing head perpendicular to the paper as you roll (this means that the handle will be at approximately a 45 degree angle to the paper).

Once the holes are punched, use the supplied needle to stitch through them - sort of like playing connect the dots with thread.

Each piercing head includes stitching directions on the back of the package showing the best order for placing the stitches.

The cards also show alternate stitching patterns that can be made with each tool and share other creative ideas such as using multiple colors of thread on a single design.

I mentioned earlier that a stitching needle is included in the starter kit. The handle of the stitch piercer includes a handy place to store this blunt-tipped (again, think cross-stitch) needle when not in use - great for people like me who are prone to losing tiny things like this only to find them again later in the most painful ways imaginable. (Don't ask me about the time I ended up at the doctor's office because of my paper piercer - let's just say that We R Memory Keepers Brad Setter and Piercing Tool and included cap is my go-to piercer because that cap keeps me safe!)

The photo below shows the results of piercing and stitching with the Zig-Zag piercing head (top), Banners head (middle), and the straight-stitch head (bottom) that comes with the starter kit. I've also left some of the holes un-stitched to give you an idea of what they look like right after piercing.

I love using stitching as an accent, so I put the Sew Easy to use right away on the layout below, using it in two small places to add a bit of handmade "pop" to this layout about my niece, Sophie, and her first big-girl wagon.


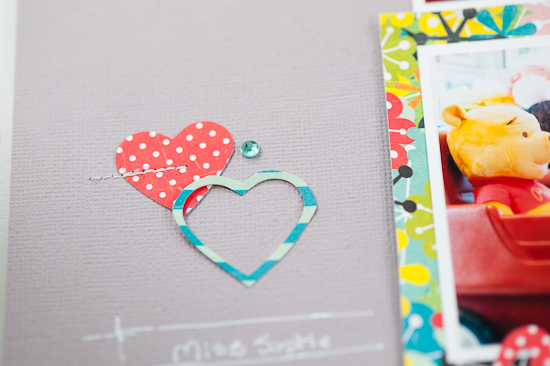
I had no problem getting the piercing head to punch through two layers of papers so I could stitch over the photo mat (shown below), nor did I have any trouble aligning the head exactly where I wanted it or keeping it on track as it rolled.


Overall, I found the Sew Easy system by We R Memory Keepers to be incredibly easy to use, and it certainly took the guesswork out of adding those hand-stitched bits to my layout. This is a tool I'll be keeping close at hand to use on many, many more projects to come
tinlineundoreumse.blogspot.com
Source: https://nallystudios.com/blog/2011/11/17/review-sew-easy-by-we-r-memory-keepers